There’s nothing quite like the adrenaline rush of capturing the perfect concert photo. The rush of the music, the roar of the crowd, and the performers’ energy all come together in a single moment frozen in time.
But to truly make your concert photos stand out, you need to take them to the next level with some editing magic. Whether you’re a seasoned pro or a newbie looking to level up your concert photography skills, Photoshop can be a game-changer.
With its powerful tools and features, you can enhance your photos and create stunning, memorable images that capture the essence of the music.
In this article, we’ll share some insider tips and tricks for editing concert photos in Photoshop that will help you take your photos from good to great.
Steps to Edit Concert Photos in Photoshop
Here are some steps:
- Importing and Organizing Photos
- Basic Adjustments
- Cropping and Resizing
- Retouching
- Creative Effects
1- Importing and Organizing Photos

Before editing, you should ensure your photos are in order. Start by bringing your images into Photoshop and making a new folder to keep them organized. You can also use the Metadata panel to add keywords and descriptions to your photos, making it easier to find them later.
Importing and organizing photos is an important part of editing that sets up a good workflow. Without a well-organized system, finding certain images or keeping track of the changes you’ve made can be hard. Here are some tips to help you get your work done more efficiently:
Use a consistent file naming convention:
Before you import your photos, give each one a consistent name. This will make it easy to find and organize your photos. For example, you could name your files with the date, the place, and the name of the performer.
Create a folder structure:
Once you know how to name things, make a folder structure that fits your organization’s needs. You could make a folder for each concert or performer or sort your pictures by date or place.
Use metadata to add keywords and descriptions:
In addition to naming files and folders consistently and having a clear structure, using metadata can help you find images quickly. Metadata is information about the photo, like when it was taken, where it was taken, and how the camera was set up. You can also add keywords and short descriptions to your photos to make them easier to find and sort.
Use Collections or Smart Collections:
After you import your photos into Photoshop, you can use Collections or Smart Collections to group images that go together. Collections let you put pictures together on your own, while Smart Collections do it for you based on things like keywords or ratings.
Putting your photos in order before you edit them can save time and avoid stress later. With a well-organized system, you can find specific photos quickly, speed up your work, and focus on the creative parts of editing concert photos.
2- Basic Adjustments

Adjusting basic settings like exposure, contrast, and saturation is the first step in editing concert photos. You can change the brightness and contrast of your images with the Levels and Curves tools, and you can change the colors with the Vibrance and Saturation tools. Don’t make too many changes to your photos or edit them too much.
After you’ve brought in your photos and put them in order, the next step is to edit them. Basic adjustments are an important part of editing that helps improve the quality of your photos. Here are some tips for making simple changes to your concert pictures:
Adjust exposure:
Start by adjusting the exposure of your image to correct any over or under-exposure issues. You can use the Levels or Curves tools to adjust the brightness and contrast of your image, or you can use the Exposure tool to make more subtle adjustments.
Correct color balance:
In concert photography, where the lighting can be hard to work with, it is important to balance the color. You can change the overall color balance of your image with the Temperature and Tint sliders, or you can use the Color Balance tool to fine-tune individual color channels.
Enhance color:
Once you have corrected the color balance, you can use the Vibrance and Saturation tools to enhance the colors in your image. Remember that it’s important to use these tools subtly to avoid over-saturating your image.
Sharpen the image:
Due to the fast pace of performances, it can be hard to keep concert photos in focus. You can use the Sharpen tool or an Unsharp Mask filter to sharpen your image. Be careful not to sharpen your image too much because that can make it look strange and pixelated.
Remember that making simple changes is just the first step in editing. It’s important to edit your photos subtly and not over-process them. By making small changes, you can improve the quality of your images without taking away from the performance’s authenticity or energy.
3- Cropping and Resizing

Cropping and resizing are essential tools that can help you further improve the quality of your concert photos. Here are some tips on how to effectively crop and resize your images:
Use the rule of thirds:
The rule of thirds is a compositional rule that says you should divide your picture into thirds both horizontally and vertically. The points where these lines meet are called “power points,” and putting your subject at one of these points can help you make a more balanced and visually appealing composition.
Remove distracting elements:
Cropping is a good way to get rid of things in your photos that aren’t important. Use the Crop tool to change your photo’s ratio and eliminate any unwanted parts, like empty space or things in the background.
Maintain image quality:
It’s important to keep the quality of your photos when you resize them. You can change the size of your photos while keeping their resolution by using the Image Size tool. Don’t enlarge your photos too much because it can make them less clear and sharp.
Consider the final output:
Consider output while resizing photographs. You may need to resize photographs for social networking. If you want to print images, adjust the dimensions and resolution.
Use the Crop and Image Size tools to improve concert images. Resize photographs while keeping quality in mind.
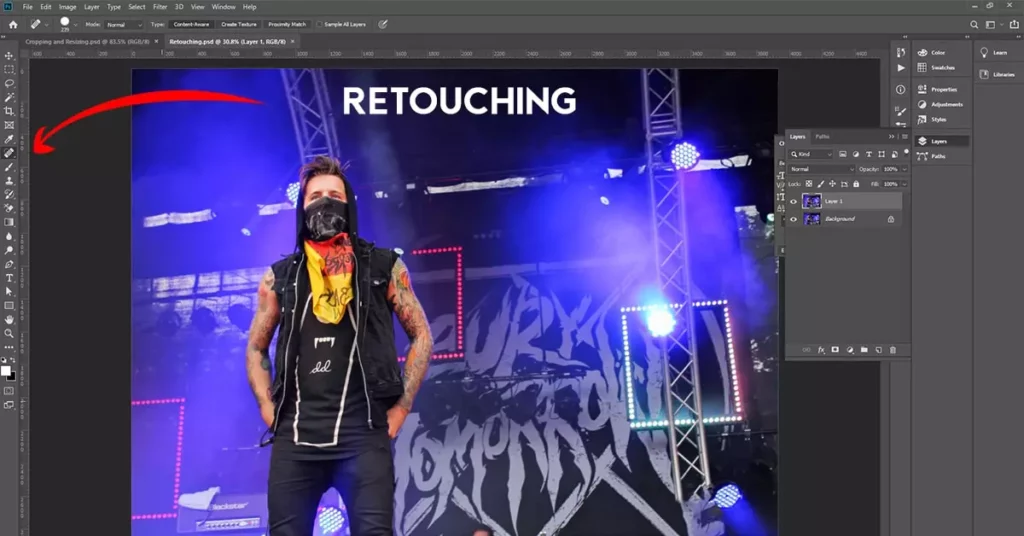
4- Retouching

Retouching is an important part of editing concert photos. It means removing blemishes, adjusting skin tone, and removing things that don’t belong in the picture. Here are some tips for retouching your concert photos well:
Identify blemishes and unwanted objects:
The first step in retouching is identifying any blemishes or unwanted objects in your photos. Look for elements that are distracting or take away from the overall quality of the image.
Use the Spot Healing Brush tool:
The Spot Healing Brush tool is excellent for removing blemishes such as acne, scars, or other imperfections on the skin. Simply select the tool, adjust the brush size, and click on the blemish to remove it.
Use the Clone Stamp tool:
With the Clone Stamp tool, you can eliminate objects or other things that don’t belong in your photos. Choose the tool, then click and drag it to cover up the unwanted object.
Be careful not to over-retouch:
It’s important not to over-retouch your photos because doing so can make them look fake. Remember that your goal is to improve the image, not to make it look like something else.
By retouching your concert photos well, you can eliminate things that take away from the photos and make them better overall. Remember to be subtle and avoid over-editing, making the picture look unnatural and fake.
5- Creative Effects

Creative effects can be an excellent way to add personality and style to your concert photos, making them stand out. Here are some tips on how to use creative effects to enhance your concert photos:
Black and White Conversions:
Black and white conversions can add a timeless and classic feel to your concert photos. You can use Photoshop’s Black and White adjustment layer to convert your color photos to black and white. Experiment with different settings to achieve the desired look.
Color Grading:
Color grading is a popular technique used to enhance the color in your photos and add a certain mood or tone. You can use Photoshop’s Color Lookup adjustment layer to apply pre-built color grading effects to your photos or create your own custom color grading effects.
Experiment with different creative effects:
You can use countless creative effects to enhance your concert photos, including vignettes, textures, and filters. Experiment with different effects to find a style that suits your photos.
Use creative effects sparingly:
It’s important to use them sparingly and only when they enhance the overall quality of your photos. Avoid using too many effects or over-processing your photos, as this can detract from their natural beauty.
By using creative effects effectively, you can add personality and style to your concert photos and make them stand out from the crowd. Remember to use effects sparingly and experiment with different techniques to find a style that suits your photos.
Final Words:
In conclusion, you can improve the quality of your concert photos and make them stand out by editing them in Photoshop. By organizing your photos, changing the basic settings, cropping and resizing, retouching, and adding creative effects, you can make stunning photos that capture the energy and excitement of live performances. Make sure your changes are subtle and that you don’t over-process your photos. Most importantly, have fun and try out different techniques.


