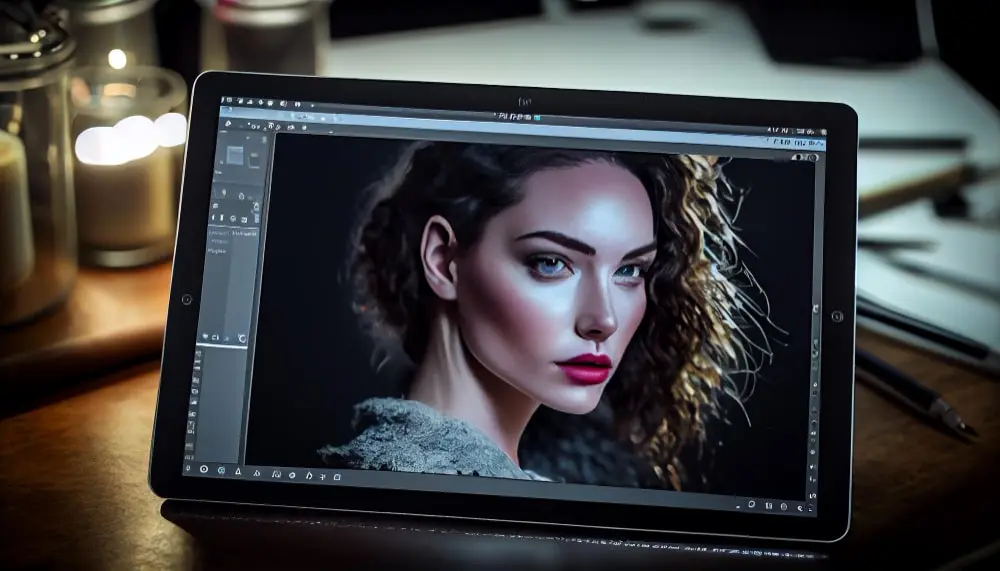


A clipping path is an image editing technique that outlines and isolates a part of an image, usually to remove the background or separate the object for further editing.
Different clipping paths include basic, compound, complex, multi, illustration, and super complex. These fulfill various object shapes and complexities. It can be a simple geometric or highly complex design. Each type serves a unique purpose in image editing and graphic design.

Here we will explore the different types of clipping paths, their applications, and how they can enhance your design projects. You’ll have a comprehensive understanding of this essential technique by the end.
Table of Contents
What Is a Clipping Path?
Before knowing about the types of clipping paths, you have to understand what a clipping path is. Basic knowledge about it is the pillar to master these all types of clipping paths.
A clipping path is a vector path that outlines an object in an image. This path detaches the object from the background. That means it is used to separate the foreground object from its background in an image
This technique ensures precise and clean edges. This allows for uninterrupted background removal or object isolation. Clipping paths are primarily created using software such as Adobe Photoshop and Illustrator.
Different Types of Clipping Paths
It is essential to know about the different types of clipping paths. To understand the intricacies of image editing as a graphic designer, professional photographer, or someone keen, knowing about these is crucial.
Here is the breakdown of all the different types of clipping paths you must know before image editing at a professional level.
1. Basic/Simple Clipping Path
To path objects with simple shapes, a basic or simple clipping path is used. Boxes, balls, and many geometric shapes can be given as examples.

Application:
- Ideal for products like books, laptops, and simple furniture.
- Commonly used in e-commerce for displaying gadgets and accessories.
Tools Needed:
- Pen Tool in Adobe Photoshop or Illustrator
Steps:
- Open your image.
- Select the Pen Tool.
- Click to create anchor points around the object.
- Connect the final anchor point to the first to complete the path.
- Right-click the path and choose ‘Make Selection.’
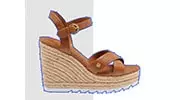
2. Compound Clipping Path
Compound clipping paths are used to handle objects that contain holes or encapsulated areas. These types of clipping paths are more complex and one step forward than basic paths.
Application:
- Shoes, jewelry retouching, and gadgets with holes or gaps.
- Useful in product photography

Tools Needed:
- Pen Tool with multiple paths creation capability
Steps:
- Create multiple paths for each visible area.
- Combine these paths into one compound path.
- Save the path for future use.
3. Complex Clipping Path
Complex clipping paths are used for objects with complex details, irregular shapes, and multiple holes. It is a more difficult way to make the clipping path of a dedicated image and objects.
Application:
- Trees, chains, bicycles, and net-like structures.
- Suitable for detailed images needing precise background removal.

Tools Needed:
- Pen Tool
- Lasso Tool for initial selections
Steps:
- Outline the detailed object using the Pen Tool.
- Create multiple paths for intricate areas.
- Save and refine the edges for a smooth finish.
4. Multi-Clipping Path
When creating multiple paths for different parts of a single image, you have to make it with the multi-clipping path. Multi-clipping path allows individual adjustment to each part of the image.
Application:
- Fashion photography where different attire parts need treatment.
- Images with various color corrections for each part.

Tools Needed:
- Pen Tool for multiple path creation
- Layers and Masks in Photoshop
Steps:
- Create separate paths for different image parts.
- Apply unique adjustments to each part.
- Manage paths using layers and masks.
5. Illustration Clipping Path
As we progress, we get more and more difficult. Illustration clipping path is one of the toughest tasks in image editing. This path is used for vector illustrations where precision is key. Objects are often abstract and require scalable paths.
Application:
- Logos, vector art or raster to vector conversion, and illustrations.
- It is essential for scalable graphics needing transparent backgrounds.
Tools Needed:
- Pen Tool in Adobe Illustrator
- Pathfinder Tool for shape management
Steps:
- Outline the vector illustration using the Pen Tool.
- Use the Pathfinder Tool for managing shapes.
- Save the path for scalable use.
6. Super Complex Clipping Path
Super complex clipping paths are the most difficult ones that fulfill images with highly intricate and numerous details. It often incorporates multiple techniques and tools.
Application:
- Images with complex combinations like a group photo.
- Detailed nature photos, including leaves and flowers.
Tools Needed:
- Pen Tool combined with other selection tools
- Advanced use of Layers and Masks
Steps:
- Create detailed paths for each intricate part.
- Use additional selection tools for complex areas.
- Save and refine paths using layers and masks.
How to Create a Clipping Path: Step-by-Step Guide
Outlining an object in an image to isolate it from the background is called a clipping path. This process uses tools like Adobe Photoshop’s Pen Tool to create precise vector paths.
By mastering this technique, you can achieve clean and professional image edits. This is essential for tasks in photography, e-commerce, and graphic design. Here are all the steps you can follow to create a clipping path.
- Open Your Image: Load the image into Adobe Photoshop or Illustrator.
- Select the Pen Tool: Choose the Pen Tool from the toolbar.
- Create Anchor Points: Click around the object to create anchor points outlining it.
- Close the Path: Connect the final anchor point to the first to complete the path.
- Make the Path a Selection: In Photoshop, right-click the path and choose ‘Make Selection’.
- Save the Path: Save the path for future use or export as needed.
Tips for Effective Clipping Path Creation
To start off, to make precision around edges, always zoom in. Then for accuracy, you can utilize smart guides and align tools. To smooth out rough edges, use edge refinement tools. After all, practicing regularly can refine your skill and speed.
Why Are Clipping Paths Important?
Clipping paths are vital for several reasons:
- Precision: Ensures clean and accurate isolation of objects.
- Flexibility: Allows for easy background changes and object manipulation.
- Professionalism: Enhances the visual quality of images for commercial use.
Applications of Clipping Paths
Clipping paths are widely used in various fields:
- E-commerce: Removes backgrounds for a clean product display.
- Advertising: Creates eye-catching ads with a focus on subjects.
- Photography: Enhances photos with altered or removed backgrounds.
- Graphic Design: Merges different elements into cohesive designs.
Benefits of Using Clipping Paths
- High Precision: Ensures clean and accurate outlines.
- Time-Saving: Simplifies the editing process.
- Versatility: Applicable in various industries.
- Enhanced Image Quality: Improves the professional look of images.
Frequently Asked Questions
1. What is a clipping path?
A clipping path is a vector path that outlines an object in an image. This path isolates the object from the background.
2. Which software is best for creating clipping paths?
Adobe Photoshop and Illustrator. Because they both have advanced Pen Tool and path management features.
3. What are the types of clipping paths?
The main types are basic, compound, complex, multi, illustration, and super complex clipping paths. Each is suited and used for different levels of detail and object shapes.
4. Why are clipping paths important in e-commerce?
Clipping paths ensure product images have clean backgrounds. It enhances visual appeal and professionalism for online stores.
Conclusion
All these different types of clipping paths are essential for anyone who is involved in digital image editing and graphic design. Every type serves a unique purpose without mattering about the image has simple shapes or highly complex structures. This ensures images are edited with professionalism and precision.
It doesn’t matter if you are a seasoned expert or a beginner. If you master these techniques, the quality of your work can be enhanced significantly.
We are hoping that you have gotten a comprehensive understanding of these different types of clipping paths. Keep practicing and apply this knowledge to your work to create epic and stunning visuals.